Trim Mapper Instructions
Setup
Copy the folder 'Trim_Mapper' to: ..\Documents\maya\20xx\scripts (xx = year number)
Copy the file EveTools_Trim_Mapper_Icon.png to: ..\Documents\maya\20xx\prefs\icons
If Maya is open then restart it.
In the MEL command line (text input box in the lower left of Maya) paste the following:
python("exec( open ( cmds.internalVar(usd = True) + 'Trim_Mapper/EveTools_Trim_Mapper.py' ).read() ) ");
Under 'Instructions' at the buttom of the tool press 'Add Shelf Button'.
If using an existing JSON file it needs to be placed in the 'Trim_Mapper' folder: ...\Documents\maya\20xx\scripts\Trim_Mapper
If you need to share trim presets then currently you will need to manually copy the values into the JSON file (if doing so the tool will not update immediately but changing preset should update it).
Notes:
If manually changing data in the JSON file it needs to conform to the format exactly otherwise the file will not be read as valid.
The tool expects at least one preset. If the last preset is deleted then a placeholder will be added. When another preset is added the placeholder can be deleted.
Creating Presets
Assign your trim texture to a material and that material to a plane (any geometry will work but for this example a plane is easiest).
Add only one edge for each trim boundry (apart from the very top and bottom).
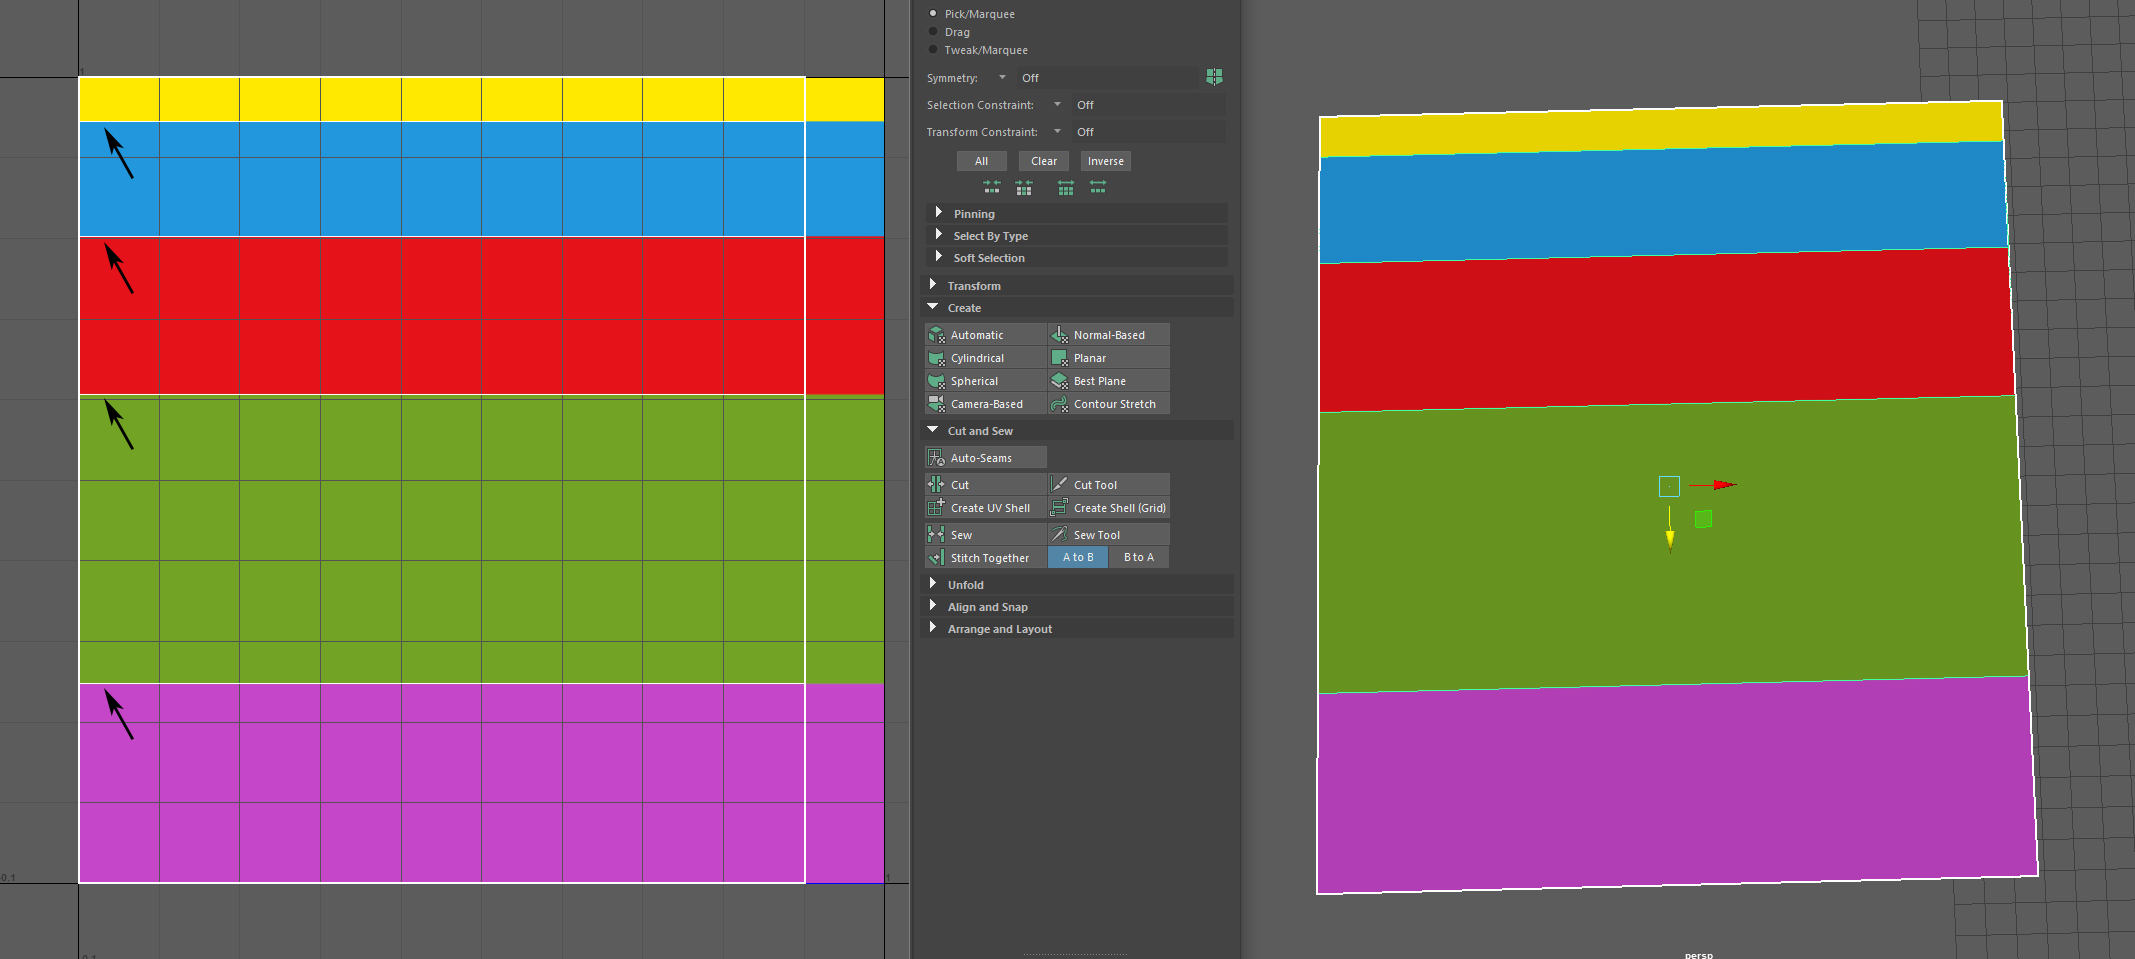
The UVs should normally be in the 0-1 range in the Y(V) axis (although the tool will allow them outside of this range), the 'Normalize' function in the UV editor is useful for making sure the top and bottom are exactly at 1 and 0. The positions on the X(U) axis are ignored.

Select one side of the UVs, add a name (although it can be renamed later) and press 'Add New Trim Preset'.
Padding can be added after creating a preset.
Padding
If working with low resolution textures or because of mip mapping there may be some texture bleed between trims. A padding value can avoid this issue by slightly offsetting the UVs when mapping.
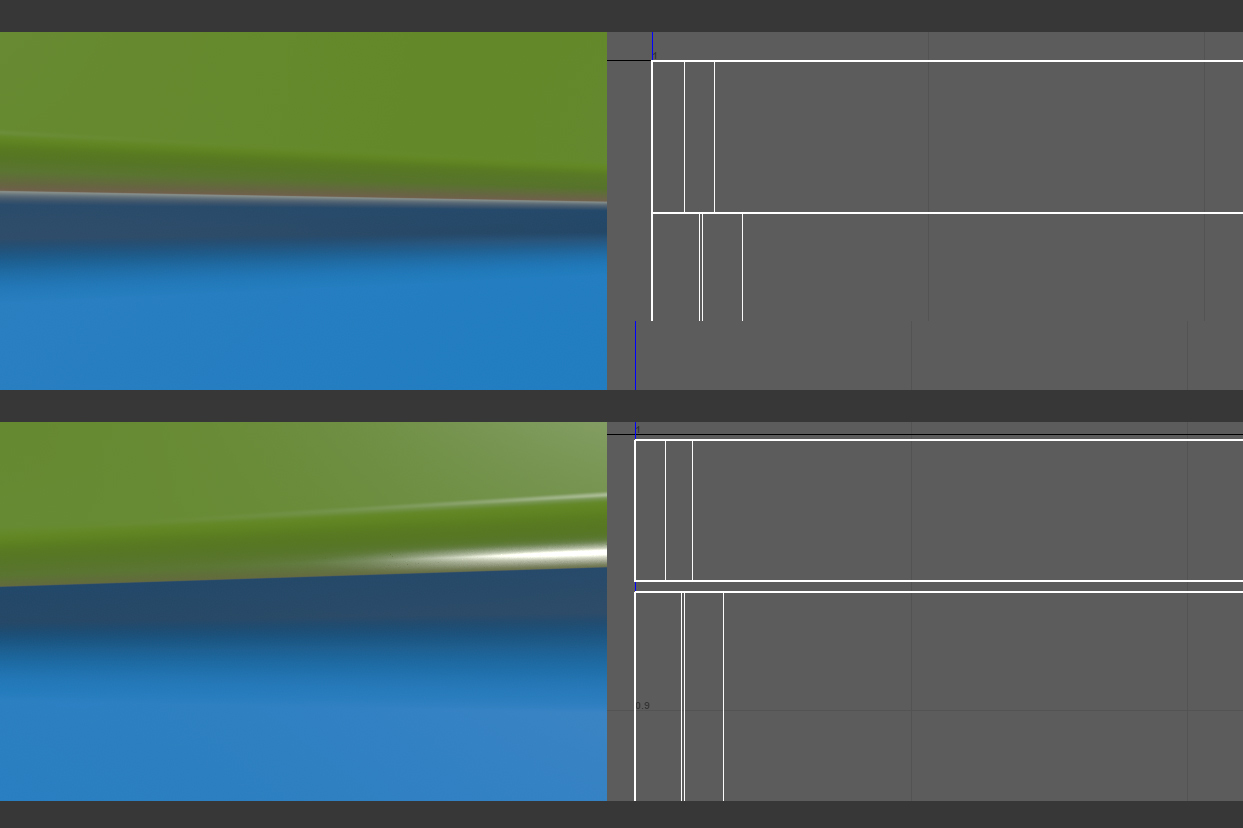
The top example is with no padding and the bottom is with padding.
Padding should always be a very low value, for example the above is set to 0.002. Values that are too high may result in the combined top and bottom offsets being larger than the trim itself when working with small trims. If this happens the tool will not allow the trim to be mapped and give a warning.
Setup
Copy the folder 'Trim_Mapper' to: ..\Documents\maya\20xx\scripts (xx = year number)
Copy the file EveTools_Trim_Mapper_Icon.png to: ..\Documents\maya\20xx\prefs\icons
If Maya is open then restart it.
In the MEL command line (text input box in the lower left of Maya) paste the following:
python("exec( open ( cmds.internalVar(usd = True) + 'Trim_Mapper/EveTools_Trim_Mapper.py' ).read() ) ");
Under 'Instructions' at the buttom of the tool press 'Add Shelf Button'.
If using an existing JSON file it needs to be placed in the 'Trim_Mapper' folder: ...\Documents\maya\20xx\scripts\Trim_Mapper
If you need to share trim presets then currently you will need to manually copy the values into the JSON file (if doing so the tool will not update immediately but changing preset should update it).
Notes:
If manually changing data in the JSON file it needs to conform to the format exactly otherwise the file will not be read as valid.
The tool expects at least one preset. If the last preset is deleted then a placeholder will be added. When another preset is added the placeholder can be deleted.
Creating Presets
Assign your trim texture to a material and that material to a plane (any geometry will work but for this example a plane is easiest).
Add only one edge for each trim boundry (apart from the very top and bottom).
The UVs should normally be in the 0-1 range in the Y(V) axis (although the tool will allow them outside of this range), the 'Normalize' function in the UV editor is useful for making sure the top and bottom are exactly at 1 and 0. The positions on the X(U) axis are ignored.
Select one side of the UVs, add a name (although it can be renamed later) and press 'Add New Trim Preset'.
Padding can be added after creating a preset.
Padding
If working with low resolution textures or because of mip mapping there may be some texture bleed between trims. A padding value can avoid this issue by slightly offsetting the UVs when mapping.
The top example is with no padding and the bottom is with padding.
Padding should always be a very low value, for example the above is set to 0.002. Values that are too high may result in the combined top and bottom offsets being larger than the trim itself when working with small trims. If this happens the tool will not allow the trim to be mapped and give a warning.
 Back to top
All Content is Copyright Brett Eveleigh © 2009-2026 - Except where otherwise specified.
All use of imagery on this site for AI/machine learning is strictly prohibited.
Back to top
All Content is Copyright Brett Eveleigh © 2009-2026 - Except where otherwise specified.
All use of imagery on this site for AI/machine learning is strictly prohibited.